Mom guilt: step aside. I’m proudly a working mom and while returning from maternity leave was hard, 6 months later I’ve found my groove and love all that it brings. Let me share with you how to survive being a working, pumping mother. First, a few must-haves to successfully pump at work to continue your nursing journey at home.
Necessities:
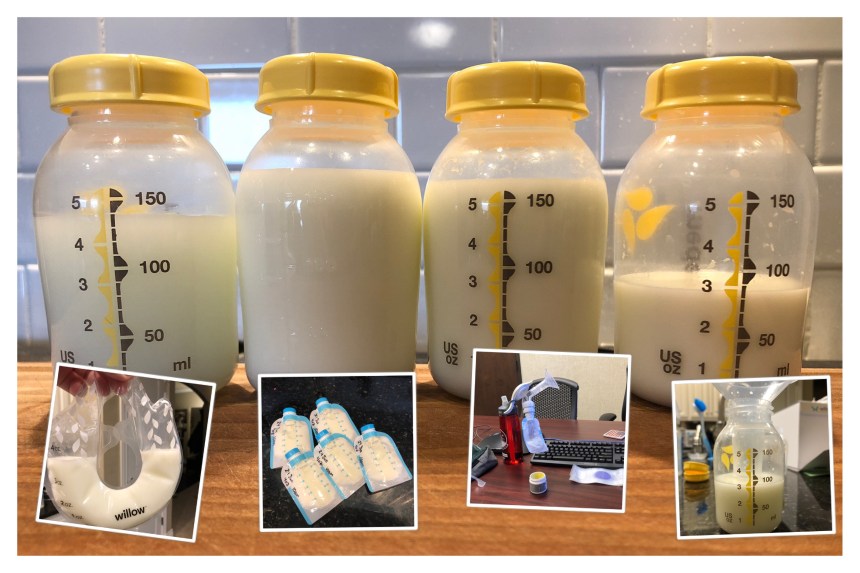
1 – Double Electric Pump
2 – Milk Storage Bags/Bottles
3 – Nipple Cream
4 – Pumping Bra
5 – Supportive Nursing Bra
Nice-to-Haves:
1 – Breast Pads
2 – Milk Transport Bag/Cooler
3 – Pumping Door Sign
4 – Travel Bag/Backpack
5 – Water Bottle
How to Survive Pumping and Nursing as a Working Mother
Throw away the guilt. The mom guilt. The work guilt. Throw away all the doubt about finding the perfect balance. There is no perfect balance. Everyday is different, and you will make it through every day. Ok, now we can chat.
There’s a few things you need to do to survive work, both returning to work and once back, finding your rythym. I will do another post on returning from maternity leave. Here’s how you survive pumping while being a working mother:
- Get Familiar with Your Pump
- Educate Yourself on Workplace & Federal Protections
- Verify Pumping Breaks with Supervisor
- Pack Pump & Supplies the Night Before
- Pack Extra Pump Parts
- Pack Daycare Bag/ Prep Bottles the Night Before
- Pump/Nurse Before Work OR Pump Once at Work?
- Set a Timer on Your Phone/Watch
- Block Yourself Out for Pump Breaks (Work Calendar/ Personal Agenda)
- Take Your Pump Breaks, with Zero Guilt
- Consider Having an At-Home and an At-Work Pump
- Keep a Handpump as an Emergency Backup
1. Get Familiar with Your Pump
Start pumping a few weeks/months before you return to work. You will be stressed out enough pumping at work, please do not delay using it until you are back at work. You’ll likely be missing pieces or use it incorrectly, possibly damaging your nipples. This could create additional stress and/or you could miss a pumping session if you have to run home to get the missing parts. Review the User Guide/Manual for your pump and watch YouTube videos/tutorials on your pump. You don’t need to pump a ton before going back to work, just enough to get familiar with the pump’s operation and with your body’s response to the pump. We are not discussing building a freezer stash right now, you just need to get intimately familiar with how the pump works. Play with different stimulation and expression patterns to see how your body responds and the best way to maximize your letdown and expression. DO NOT start on the highest settings. You’ll hurt yourself and probably prematurely end your nursing & pumping journey.
2. Educate Yourself on Workplace & Federal Protections
Do your research to know your rights. Your employer likely has a policy for how they approach breastfeeding/pumping breaks. Ask your HR department if you cannot locate it. If they don’t have one in place, coordinate with your supervisor for individual accommodations. In 2010, the Affordable Care Act outlined pumping breaks, as well as the “Break Time for Nursing Mothers” law provides protections for you. You can reference the United States Breastfeeding Committee’s website for additional information.
3. Verify Pumping Breaks with Supervisor
As mentioned in the previous tip, coordinate with your supervisor. Regardless of what your employer’s policy is, touch bases with your supervisor to educate him/her of your intentions. You do not need permission to pump every day. You are protected from discrimination based on your federally protected right to pump. Perhaps your supervisor hasn’t had kids, or she (or his/her partner) never/couldn’t nurse and don’t understand. I had two male supervisors who were very supportive of my pumping breaks, however not all my girlfriends have been so lucky. Either way, set their expectations that you will work hard while doing your job, and that you will also be away from your job in order to pump. Over time, you can educate your supervisor regarding the benefits to you and your child of nursing/pumping. So, so, so many benefits! Visit the American Academy of Pediatric’s website and the Cleveland Clinic’s website to learn more.
4. Pack Pump & Supplies the Night Before
The mornings with a child (let alone multiple children) is pure chaos. Get your ducks in a row before you go to bed. This will prevent forgotten parts, dead batteries, allow you to wash the parts you need, etc. Heck, you can even pre-position the pump bag in your vehicle or by your door. Anything to get ahead, do it. I prep mine, however I’ve heard of some husbands packing their wives’ bags in a way to show support. How do I sweet talk my hubby into that?
5. Pack Extra Pump Parts
Extra extra extra parts! I recommend having enough parts at home to make it 24 hours without doing dishes… because mom life is hard. In addition to extra parts at home, pack extra parts for your pump bag. You don’t need two extra flangers or connectors, however I do recommend keeping multiple of the little/lightweight things, such as the Medela valve covers (those awkward little white flaps) and extra tubing. As well as extra bags in case you forget bottles or you have a bag break or anything. Milk bags take up zero space, so keep a handful hidden in your bag.
6. Pack Daycare Bag/ Prep Bottles the Night Before
Just like step 4 above, do anything to get ahead. We set out the bottles, parts, labels (required per our daycare), the cooler transport bag, and thaw the milk overnight. In the morning, pull the bottles out of the fridge, toss in the bag, and get out the door. Typically, we let the baby sleep a bit longer while we are prepping his daycare bag, and once we are 100% ready for the morning with baby, we then wake him. We also leave excess supplies at daycare, and I will write another post on that.
7. Pump/Nurse Before Work OR Pump Once at Work?
Your morning may be pure chaos at work, or perhaps its a slow start and gets busier midday. Figure out how to best manage your time and accommodate your pumping needs. In a perfect world, I’d nurse baby before work, however his nursing sessions are unpredictable regarding timing, and that doesn’t work for me on workday mornings. My employer allows for a pump break every 3-4 hours as needed; I feel no guilt taking a pump break as soon as I get to work and then waiting 3-4 hours for my next one. I have also coordinated to arrive late to work, for the same amount of time it would take me to pump at work. That’s on a case-by-case and day-by-day that I use very rarely.
8. Set a Timer on Your Phone/Watch
Utilize an alarm/timer to remind you to step away from your desk and go pump. Another advantage of this is for your supervisor or coworkers to hear that alarm go off (turn it up loud), and then use it as a transition out of a conversation or phone call. Go pump. Do not delay/snooze that alarm. Your breasts will be painful and habitually delaying your pump breaks will likely decrease your supply. You and your baby deserve your best effort to pump consistently. Think of how frequently your baby nurses on a day home, and use that interval.
9. Block Yourself Out for Pump Breaks (Work Calendar/ Personal Agenda)
Very similar to the timer, use all your tools and block your calendar in advance for your pump breaks. This also provides predictability for your coworkers to plan around. You’re not “escaping” work to go pump. You and I both know how exhausting and uncomfortable pumping can be, so to any coworker who gives you grief, ignore them. You’re feeding your baby. Again, throw out the work guilt. Other coworkers are wasting time on smoking breaks or wasting hours on their phone, so do not feel guilty taking your pump breaks.
10. Take Pump Breaks, with Zero Guilt
None. Zero. Zilch. Do not allow yourself to feel guilty or allow your coworkers to guilt you. Bring a photo of your baby or look at photos on your phone, this will help your letdown. Enjoy this moment, as its the closest thing to your baby and you are amazing. I like to look through photos & videos from maternity leave, of him bobbing away on the boob, of him snoozing on my chest post nursing, of him babbling and giggling. Oh my, I’m about to cry just thinking about him. I’m also pumping while writing this post… so there’s that. The first few weeks at work I felt guilty, and one day I just said to hell with that. I’m providing for my child so I refuse to feel guilty anymore.
11. Consider Having an At-Home and an At-Work Pump
If toting your pump back and forth to work is not working out, consider buying a second one. This may be a financial decision for some, but some companies do provide a hospital grade pump for communal use. I personally have multiple pumps and take the one to work each day that best fits my schedule. I don’t like to leave my pump at my desk, as I’m constantly in different rooms and buildings, however if you have a dedicated cubicle or pumping room, consider leaving your pump and supplies there.
12. Keep a Handpump as an Emergency Backup
This will be your saving grace some day. So many things can go wrong: forgetting to charge your pump batteries, forgetting your connectors, forgetting your valves, forgetting bottles/bags. Girl, there will be a day you forget something. Keep a single hand pump in your bag. Otherwise, you’ll be hand expressing into a paper towel or toilet paper in order to relieve the pressure. Please learn from my mistake.
I hope you’ve found his post helpful. Being a working & pumping mom is a crazy journey. At first my goal was to make it a week, then a month, and now my goal is to make it to my baby’s first birthday. If this journey stops soon, I’m okay with that, but I’ve found my groove and I’m enjoying this experience. I hope you find success as a pumping mother, and that you, too, enjoy your experience. I send you all my love and hope to catch you again soon!
Love, Vicki Victoria
******
My Recommendations:
Necessities:
1 – Double Electric Pump
Medela Pump In Style Advanced * – My go-to favorite pump. Not the most glamorous, but after nearly 10 months of heavy use, its my dependable pump. Not as comfy of a suck as the Spectra, but its very intuitive on increasing the level. A bit bulky with the backpack, and the back pack isn’t very practical, but overall my fave.
Spectra S1(or S2) * – I bought the S1 six months into my pumping/nursing journey and wish I’d gotten it sooner. The suckle is much comfier than the Medela PISA, which means you’re less likely to damage your nipples, however the customizable modes allow for complete control.
Willow Pump – My gosh do I love this pump! However, I don’t recommend it as your only pump unless you are exclusively nursing at home and using it as a secondary way to empty your breasts. Its a great supplement to another pump and/or nursing.
2 – Milk Storage Bags/Bottles
Medela Breast Milk Collection and Storage Bottles – 5oz * – These are my favorite to pump with and I use with both my PISA and my S1. The 5oz size is nice, any if I used the 8oz ones, I’m afraid they’d be too tall and awkward attached to my breast. Five ounces is heavy enough hanging off my breast, and they’re the perfect storage bottles in the fridge as well.
Kiinde Bags * – These are awesome. Absolutely awesome. They’re very durable and stand upright to thaw in the fridge. While they are a bit bulky when frozen, I still love them. You can use these to store purees, juices, water, milk, seriously these are amazing. The Kiinde system * never worked for us, but many of our daycare friends love to use the Kiinde system with minimal parts.
Willow Milk Bags – Only necessary with the Willow Pump, as nothing else on the market is compatible. These are indestructible. I once frisbee-tossed a full bag at my husband, he failed to catch it, and the milk bag survived intact. I call that a win.
3 – Nipple Cream
Oh Girl, take care of your nipples. Using nipple cream while pumping changed my life. No longer painful, and then I treat my nipples after a pumping session with some cream to help heal. My favorite creams are the organic nipple creams. I’ve tried and loved Motherlove * (favorite, but expensive!), Earth Mama * (arguably best value), Honest Company * (high unit price), and Bamboobies * (a little bit more watery-slip feel). Bamboobies makes a travel tube, which I used to start, but I blasted through those quickly and I didn’t need the practicality of the small tubes. I’d recommend one of the tubs previously listed instead of the travel tubes. I also tried Lanolin, but didn’t like the feel of it.
4 – Pumping Bra
Simple Wishes Hands Free Bra * – This has made pumping much more enjoyable. Instead of holding the flanges, I can instead play on my phone or use my computer. Buy the black bra. Momma, trust me, buy the black bra. The pink one is cute, but after just a few weeks, the oils you use will start to show and it will look unclean, no matter how many times you launder it. Skip this bra if exclusively using Willow.
5 – Supportive Nursing Bra
Bravado! Designs Women’s Maternity Body Silk Seamless Nursing Bra * – This is the BEST bra for nursing and maternity. I started with the Kindred Bravely bras, and while I still use them, there is no comparable maternity/nursing bra to the Bravado Seamless. OMG. Supportive. Comfortable. Versatile. My sister-in-law told me about these and the ~$49 was intimidating, but now 10 months postpartum, these are my favorite. I bought these when 8 months pregnant and with the extender, they have help up excellent since then. I recommend at least a nude one and a black one. If you only use the Willow Pump, these are my fave to pump with Willow, as the cup is stretchy AND supportive enough to hold the weight of my Willow.
Nice-to-Haves:
1 – Breast Pads
Bamboobies Overnight Breast Pads * – I’ve tried over 4 types of reusable nursing pads and a handful of disposable pads. If I could turn back time, I’d invest in only these. I use them day and night, and think they’re the most luxurious and comfortable nursing pad. Our nipples are delicate and important, they are feeding our babies, please take care of them! The Bamboobies day pads are heart shaped (“aweeee”), but they slide around and don’t stay in position. They’re also thinner and less comfy. The large blue shape of the overnight pads actually lays really nicely on the breast and doesn’t create extra folds/creases. Other ones I tried created lumps around my breast under my bra. Nobody has time for lumpy boobs.
2 – Milk Transport Bag/Cooler
Kiinde Cooler * – Surprisingly, this cooler is perfect for a day at work with my Medela, Spectra, or Willow pumps. I often tuck the Willow flanges into here as well and they stay cool and I don’t have to clean them in between pumping sessions.
3 – Pumping Door Sign
Who’s had their locked pumping door opened on them? “Don’t mind me boss, but my boobs are out!” I had the slider “Room in Use” to the red “Occupied”, I had the door locked from the inside, and still a coworker used the master key and ignored the sign. Some people overlook these things. He was more embarrassed than I was and I refuse to be embarrassed. My recommendation is to use a door sign that is blatant about pumping inside *. It is purple, it stands out in the work environment, and somebody literally has to put their hand on the door sign in order to open the door.
4 – Travel Bag/Backpack
Current Bag for Willow Pump- Kiddy Care Diaper Bag Backpack * – I have put this bag through the ringer for 8 months and have only one minor tear on an inside pocket. The side pockets are PERFECT for the Willow Pump. I toss my Kiinde cooler inside, throw in one of the charge cords, and extra parts. Bam. I can pump anywhere. On an airplane. While shopping in target. While road tripped to San Antonio. Girl, with Willow I can pump everywhere. Ok, this is supposed to be about the bag, but seriously I love my Willow.
Bag I’m about to Buy for Willow Pump – TourIT Insulated Cooler Backpack * – This bottom cooler section is why I’m going to get this. The top padded section is perfect for Willow and parts. The bottom cooler will allow me to keep more cooler bricks in there to stay out longer and also keep my water bottle and lunch cold.
Current Bag for Spectra S1 – Banana Fish Breast Pump Back Pack * – The side pockets are large enough to accommodate the Spectra pumps. The inside and external pockets are great as well.
5 – Water Bottle
Hydrate. Hydrate. Hydrate. It takes water to make milk so drink up! My fave are glass bottles, but you probably already have your favorite bottle, so get an extra one and keep them on hand at all times.
*The links above are referral links, however it does not change the price to you as the consumer. Thank you for supporting my work by purchasing through the links above.
******
Thank you for reading today. I am neither a certified Lactation Consultant nor a trained medical professional. These are recommendations I share from personal experience, however not founded in any medical journal. Please tailor my tips above to your needs and seek medical attention if needed. Thank you.
